Thursday, November 20, 2014

Nursery Rhyme Units

With being a special education teacher you always have to be on your toes changing materials, be ready to quick change something on a lesson because the students don't understand the concept and if they catch on to the concept really fast and you need to challenge them more. I teach a wide variety of ages from birth to 21. Granted, I'm only in the elementary building and the highest grade level that's in our school is 6th grade. With also being the early childhood special education teacher, I feel like I'm always having to find different materials or what I'm finding is pinpointing the kinds of topics I want the students to grasp. I was at a loss and didn't honestly know where I needed to go from there. I talked with the kindergarten teacher finding out more with what the students need to learn with the changes in our reading curriculum. The curriculum now is a lot harder then before. She stated that she used to do nursery rhymes that would focus on teaching students a nursery rhyme, identifying letter, sequencing, numbers and rhyming. I took that idea and ran with it.

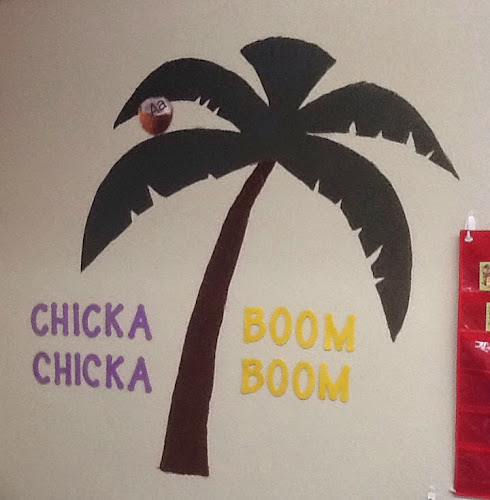
My first step was determine if I wanted this to surround a certain theme. Looking through my books, I found the "Chicka Chicka Boom Boom" book. I really liked the idea of the coconut tree and having coconuts with letters on them. Then I would place them on the tree and as we learned so many letters I would drop them to the bottom of the tree like the letters fell off the tree.

Once I picked my theme, I went to my principal and asked if I could pain the actual tree on my wall otherwise every year I would be remaking the tree and wasting a whole bunch of paper. The kindergarten teacher helped me with the painting. We found a picture of a palm tree, copied it on over head transparencies and put it on the wall. We then traced the outline and the painting began. It did take more then one coat of paint to make sure there were no white spots.


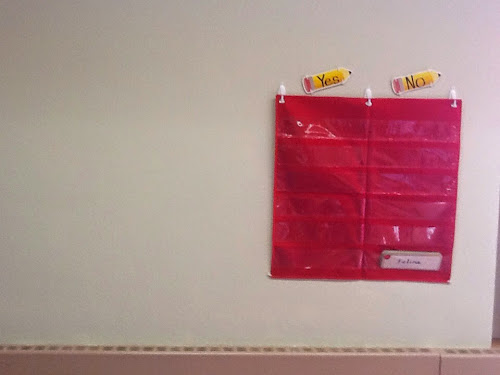
This is a picture of the wall before we started the project. I did put a pocket chart on the hall with the concept of yes or no. Which means.....the letter we are working on, we will look at our name on a card and determine yes the letter is in my name or no it's not.

The starting of painting the tree. (I roped in the kindergarten teacher to help me!) :-)

This is what the tree looked like on e it was painted.

The next part and was the hardest part is finding all the materials including, tracing letter activities, sequence cards, puppets, art projects, stories and magnetic letters. I also found that having to pick a nursery rhyme to go with a each letter was challenging. As of today, I identified every nursery rhyme I am using with the letters of the alphabet. I found this process easier with making a word document with the letters of the alphabet and writing down what nursery rhyme I used help me make sure I didn't use the rhyme more then once. Once I gathered the materials I put them in plastic folders and put them in a drawer that I designated to that letter. With my drawers I did put more then one letter in a drawer.


I labeled each folder with the nursery rhyme on the top, so I wasn't having to open the folder every time I switched letter.


As I am finding the materials, I looked around on the internet for coconuts with the letters on them or coconuts that I could program myself. I was lucky enough to find it already done. I printed them on card stock and then had them laminated. When looking for materials, I looked for nursery rhyme lesson plans, activity ideas, the actual nursery rhymes and if there was a book that went along with it. Between the nursery rhyme books that I had and with the materials in them and the internet, I came up with quite a few materials for the different nursery rhymes. With my search I looked for some sort of puppets or something for the students to use to recall events from the story. I started with the idea of a felt board, but looking around that was going to get expensive. I then found a nursery rhyme packet that after each nursery rhyme, came the characters that were in the story. I once again printed those and laminated them.The process of cutting them all out and sorting them. Yes, it does seem a lot of work, but in the end it was a lot cheaper then completing a felt board.

The beginning of the puppets

Once I was done with that, I had to come up with how I was going to have students show these. Whether I was going to have them just hold them up or use magnets and have them putting them on a cookie sheet. Well, for the size do the pieces it wouldn't work. Then my next thought was a white board and if that was magnetic. As we all know it's not. Then, I figured out that I could have two magnets connect to each other. So, I found my old white board and sectioned off a place to make it magnetic. There is paint out there that you can spray, but I still wanted to be able to use the white board. I am a person that things have to have an order and spaced evenly. Granted I can't always make it happen. I started measuring with the help of the kindergarten teacher of the area I wanted it. I will tell you before I show you I did. It make my lines straight. I just kind of drew lines to mark the area. As I went to put the magnets up, I held the puppets in the general area I wanted them.


I wanted to also have the numbers on the board so they knew 1st, 2nd, etc.
With the cut out numbers.


I am the type of person that is very organized and likes to know where everything is at and at my finger tips. I got these bins from thirty one and hooked them to the wall with 3M hooks.
Here's what it looked like with the names in place.


This is where I sit when I read to the students, but do majority of the teaching on the floor next to them.

Finally......the title is put up!

I hope in someway I have inspired you to come up with new units and fun activities for your students.

I am pasting my list below that I used to help keep track of the nursery rhymes I used.  Feel free to use the list or modify to your liking!  :-) 


Nursery Rhymes Coordinating with the Letters of the Alphabet

A: Way Up High in the Apple Tree
B: Baa Baa Black Sheep
C: Hickory Dickory Dock
D: Old Mother Hubbard
E: Little Bo Peep
F: Once I Caught A Fish Alive
G: Mary, Mary How Does your Garden Grow
H: Humpty Dumpty
I: Itsy Bitsy Spider
J: Jack and Jill
K: Lucy Locket
L: Mary Had a Little Lamb
M: Little Miss Muffet
N: Jack Be Nimble
O: Polly Put the Tea Kettle On
P: Peter Peter Pumpkin Eater
Q: The Queen of Hearts
R: Three Blind Mice
S: Pop Goes the Weasel
T: I’m a Little Teapot
U: Little Boy Blue
V: Five Vipers
W: The Old Woman Who Live in a Shoe
X: Sing a Song of Sixpence
Y: Hey Diddle Diddle
Z: Fuzzy Wuzzy


Happy Learning
Shannon


Wednesday, October 29, 2014

Go Fish

Like I've said before I think I live on teacherspayteachers. This is the most wonderful thing they could have ever come up with. I've been working with a girl that can teach me how to make my own materials. This might save me some money too!

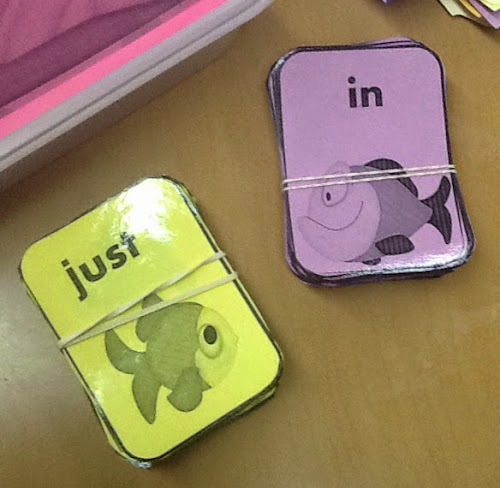
I remember growing up and loving to play Go Fish. Well, I came across this game just like when I found Old Maid. It was the same concept as the original game, but it was using sight words.

The Go Fish game started with pre-primar and went up from there to 3rd grade I believe. I didn't want to print them in color, because it would use a lot of ink. So, I printed them out in black and white then made copies of them using different colored paper so I knew which levels were what. My students love playing the game! It's really wonderful to help the students work on sight words along with those students who just need to bre refreshed.


Each student get's five cards and the rest go in the middle all mixed up. When they are given the cards the go through and see how many matches they can make first.


Happy Learning!

Shannon


Tuesday, October 28, 2014

Fundamentals of Writing

I have students in my classroom that at all different levels. I went to this workshop when I first moved to Minnesota. It's a Kanasa Learning Strategy. I really love this writing program. It starts out basic and then moves into more challening sentences. Everyday, it reviews subjects, verbs, capital letters and end punctuation.

Somedays this is a very hard concept for my students and somedays they are being able to answer all the questions right away. In each level there are what they call, "Cue Cards." These cards have information on them and reminders for students on what they need to do. There are also practice worksheets for the students. They are labeled A-H. In front of them they have a number that matches with the lesson we are on. There are also worksheets that has them writing their own sentences using the materials we have learned. The way the worksheets work is that the student has to get a certain percentage on the lesson before they can move on. You normally start out with the paper that says B on it, because you do the A paper together. If they do not reach the percentage on the first try you go over the sentences and then have them try it again.

When we started this out, I would just write the sentences on a white board. I was always erasing them to write a new sentence and that took time. I decided to then use the Smartboard. Before the students came, I would type the sentences into the notebook. This way when we worked on the sentences I would just turn on the Smartboard and we were able to make the corrections. Once they were done I would close it out and not save it. This way when we would go back and review, we always had the sentences without the answers.

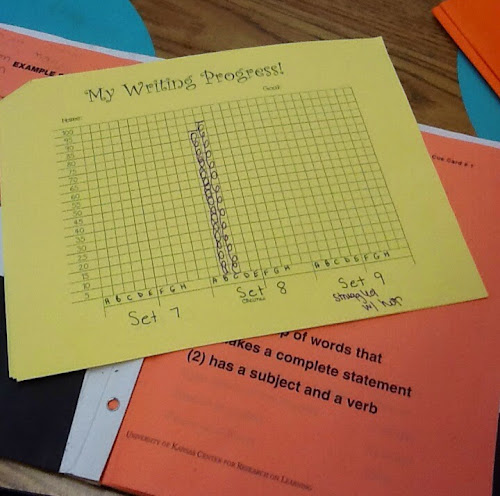
Here is some pictures of what the folders look like, the progress charts I made, what the lesson worksheets look like and the students working on correcting the lessons.
 

I always make notes on the progress sheets if they needed help and if they struggled with it.


Monday, October 27, 2014

My Wonderful Students

So, this post is not showing an activity that we complete in the classroom, but the wonderful students that brighten my day. These are only my morning groups. In the afternoon I have preschool and kindergarten. Throughout the day in my room I have students that come in and out and stay awhile to complete work at their own level. We all know that special education can be stressful at times with the paperwork, deadlines and being monitored by the state. I look forward to the students in my room that make me laugh which is all of them and make me forget the times that are hard. I just wanted to share some pictures that I have took!


Getting some Ipad time!


One of my awesome paraprofessionals that help me cut out my laminating. I love to go onto teacherspayteachers.com and find the wonderful education games.

Working with blocks. Each block has a letter of the alphabet. We are working on the letters of the alphabet. He loves tracing the letters and then building towers with the blocks.

My students loves to erase the smartboard after we get done doing our writing. This little girl is very tiny and small. She was cracking me up by trying to erase the board. She kept jumping up and down. I finally had to take pictures of her trying. Some of them are a little blury from when she was jumping.


Getting some air off the ground! LOL


Hope you enjoyed!

Happy Learning!

Shannon


Thursday, October 16, 2014

Building Sentences

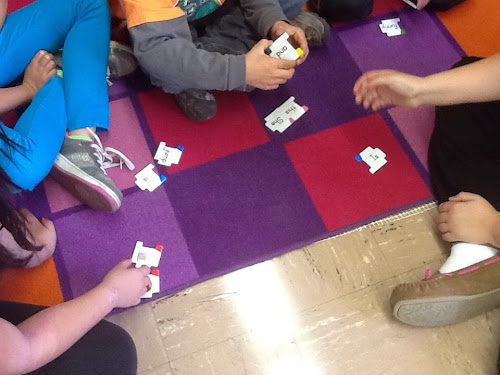
We have been working on how to build a sentence that includes a subject and a verb. We've also been working on making sure the sentence makes sense, has a capital letter and has an end punctuation mark at the end. The biggest trouble I find with my students is that they struggle with making sure the sentence makes sense. Currently, I'm using a program called, "Fundamentals of Writing." It's a Kanasa Strategy Instruction Model program. I really like how it starts out easy and contiues to build harder. I also like to have games that are fun, build team work and another way of learning about sentences. I have a couple different boxes that have cards in it that you can build sentences with. The first box, which is what we started out with has pictures along with words. This is the one I will be showing you today. There are 250 cards in the box. I took them all out and layed them upside down on the floor. Each student took 2 cards and moved to the carpet. They worked together to form a sentence. The trick with this is, they sentence had to start with a capital letter, but if they had more then one capital letter that they picked, it could not be used for the middle of the sentence. This make it tricky, because it may have not made sense to use it at the beginning, but may have made sense to use it in the middle of the sentence. They could use the picture cards anywhere in the sentence and not just at the end of the sentence.

Once they did have a sentence together, which they did not have to use all the cards, I would count up how many cards they used and we would write the number on the board. Besides having to form correct sentences we also kept track of points. With this game, you could form teams to see who could make the longest sentence.

Laying out their cards to see what everyone had.


Happy Learning!

Shannon


Wednesday, October 15, 2014

Sight Word Bowling

Here is a fun game for any student. It brings the sport of bowling and learning all at the same time. You are not actually bowling, but the picture are of a bowling ball, the scoring sheets are an actual score sheet you would see at a bowling alley. There are different levels of this game, so if you have students at different levels they do not feel hesitant when having to practice saying a word. This game also includes math. The object of this game is to get the most points at the end of the game. Each time you pull out a bowling ball, you say the word. If you get it correct, you count the points on the bowling ball. If you are unable to say the word you would score a 0 also known as a "gutter ball."

The way I set this game, is with different containers that have the different level of sight words. I also clipped the bag I stored to cards to the inside of the container so that way the students can see which level it is. Also, after they are done with the card they are to put that card back in the correct container.

With the worksheets, each worksheet has different amount of players along with how many innings they want to play. My students enjoy this game and it's one of the first games they pick when they are moving from one activity to another and have a little down time.
 
You can see in this picture the numbers in the corner of the letters. The squares remind me of playing scrabble.


Happy Learning!

Shannon